

Howdy, Stranger!
It looks like you're new here. If you want to get involved, click one of these buttons!
Categories
- 241.5K All Categories
- 22 >> Start Here <<
- 12 New Members
- 8 FAQs
- 86.6K Gear
- 39.5K Guitar
- 3.4K Acoustics
- 1.3K Bass
- 14.6K Amps
- 17.2K FX
- 267 Digital & Modelling
- 765 Other Instruments
- 8.3K Making & Modding
- 421 Gear Reviews
- 107 Guitar Reviews
- 73 Amp Reviews
- 119 FX Reviews
- 87 Other Reviews
- 748 Made in the UK
- 974 Theory
- 1.8K Technique
- 2.1K Live
- 3.2K Studio & Recording
- 2.1K Making Music
- 218 Events
- 15 Guitar Show 2018
- 829 Plug My Stuff
- 105.1K Classifieds
- 41.1K Guitars £
- 2.8K Acoustics £
- 138 LH Guitars £
- 897 Basses £
- 10.5K Parts £
- 18.3K Amps £
- 34K FX £
- 2.8K Studio & Rec £
- 6.1K Misc £
- 465 Personnel
- 54.7K Chat
- 36.5K Off Topic
- 1.1K Tributes
- 6.6K Music
In this Discussion
Become a Subscriber!
Subscribe to our Patreon, and get image uploads with no ads on the site!
First Kit Build - All crit welcome.
 KingNothing
Frets: 22
KingNothing
Frets: 22
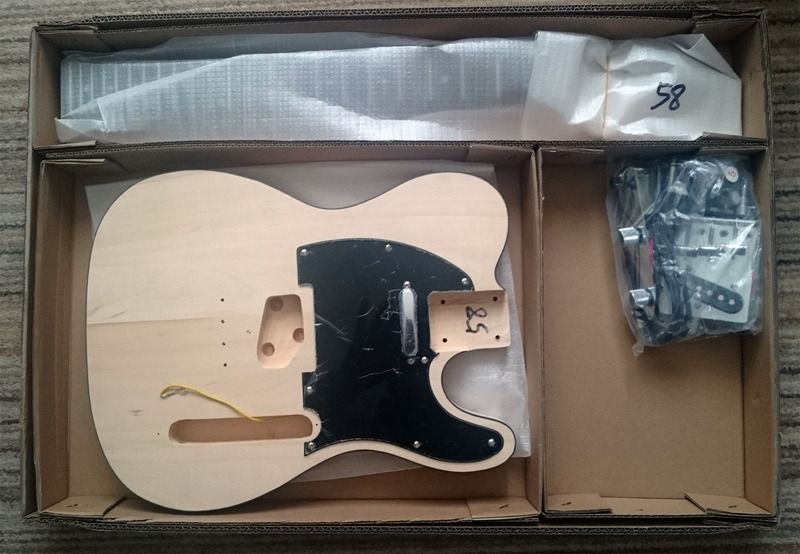
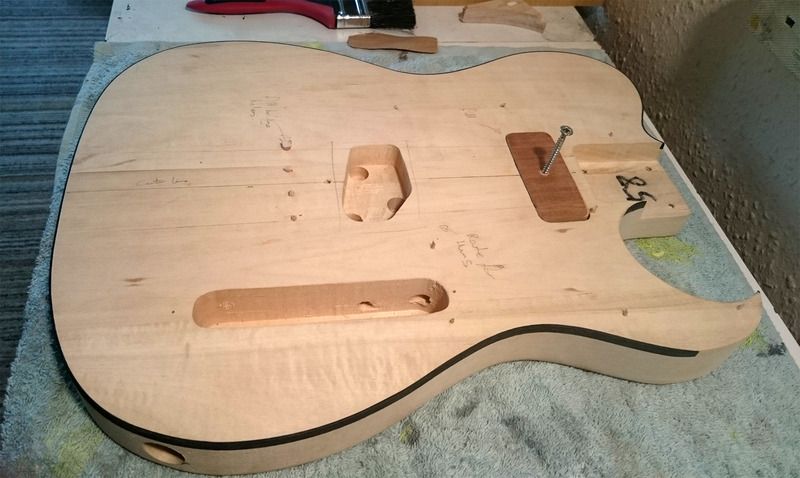
This is my first kit build and I'm trying to build up the tools as I go along and eventually start a build from scratch.
Anyhow here's what I've done so far, I aren't expecting this to be perfect I'm just using this kit to try a few techniques:
Veneering, body shaping, fret inlays, side dots, binding etc.
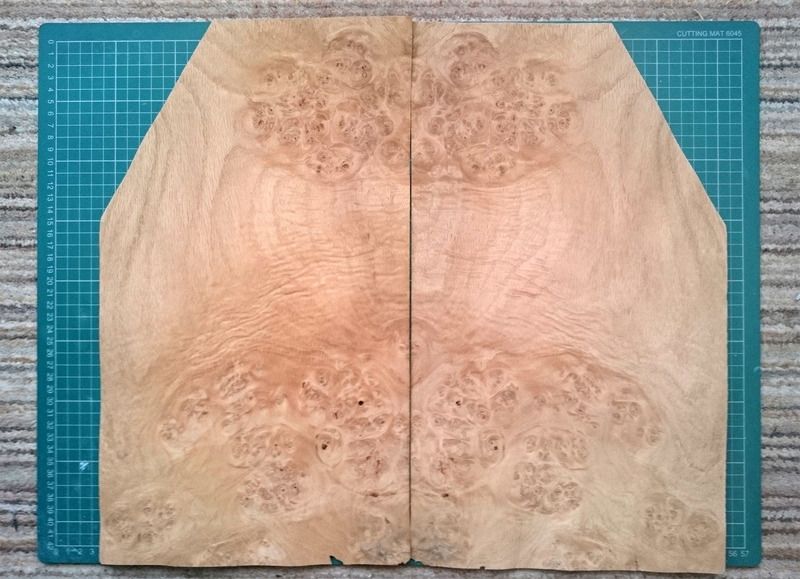
The veneer is very brittle (0.6mm oak burr), I had to soak it a little so it didn't chip and I'm worried its gonna rip to pieces when I rout it for the binding.
Also can anyone point me in the right direction for the correct router bit for the binding and a good site for wood stainers.
Any crit, tips will be noted. Cheers.
Anyhow here's what I've done so far, I aren't expecting this to be perfect I'm just using this kit to try a few techniques:
Veneering, body shaping, fret inlays, side dots, binding etc.
The veneer is very brittle (0.6mm oak burr), I had to soak it a little so it didn't chip and I'm worried its gonna rip to pieces when I rout it for the binding.
Also can anyone point me in the right direction for the correct router bit for the binding and a good site for wood stainers.
Any crit, tips will be noted. Cheers.
0 LOL 4
LOL 4 Wow! 0
 Wisdom
LOL 4 Wow! 0 Wisdom Base theme by DesignModo & ported to Powered by Vanilla by Chris Ireland, modified by the "theFB" team.
Comments
Have you left the existing black binding in place?
There are a couple of ways to help prevent chip out.
1) tape the top with low tack masking tape (or normal masking tape applied to you t-shirt first) before routing the binding.
2) pre-finish/seal the veneer to help stabilise it before routing, then bind and carry on
Sharp bits are the real key whatever you do
Instagram
I've had better success with 'Trend' branded bits which are dearer than Silverline but don't cost the earth - I thought they were the same manufacturer to begin with and I'd been had, but they seem a good bit better made so now I'm not so sure.
Thanks WevZ that bit of info is very helpful, I'll try the masking tape trick, I was wanting to stain the veneer so treating it first probably isn't a good idea.(?)
This is the bit I've been looking at randella, it's a little more expensive than I'd have liked but as we all know.. you can't put a price on quality tools. This has the 1mm rebate but I was hoping it had the 2mm too and I can't find a bearing set anywhere for a reasonable price.
https://www.amazon.co.uk/Trend-46-Tungsten-Carbide-Rebate/dp/B0001P10EO/ref=sr_1_4?s=diy&ie=UTF8&qid=1465242525&sr=1-4&keywords=rebate+bit
As for quality.. well its a 4 piece body, rough sanded the binding isn't bad, just needs finishing, the neck profile isn't bad either, it looks straight and it fit snug in the neck pocket. I filled the holes for the bridge as it was 1mm off center so be sure to check things like that.
The hardware is tosh but I really don't want to put too much money into a £59 guitar so I might buy cheap Wilkinson tuners, bridge and pup if I don't arse anything up before it comes to installing them.
It's not plug and play and for some reason I didn't get any instructions/schematics so I'll have to have a root about for them online.
It's worth £60 if you don't mind putting some effort and time in to it, you pay more than that for body blanks. There's a few lads on here who have done amazing jobs with these cheap kits.. it's where I got the idea from anyway.
http://www.thefretboard.co.uk/discussion/30285/the-really-useful-posts-index#latest
Instagram
The Trend 1/4" pattern follower I used was rock-solid, night and day from the cheaper bits. The bearing followed the template accurately with no over- or under-cut, and the cutting edges were perfectly capable (making sure to not cut too much at once) - they sliced through swamp ash like it was a bar of soap.
As for the Silverline stuff - the pattern follower I tried went straight in the bin, it literally was useless. You'd be better off setting fire to £10. The round-over was a bit better, but nowhere near sharp enough.
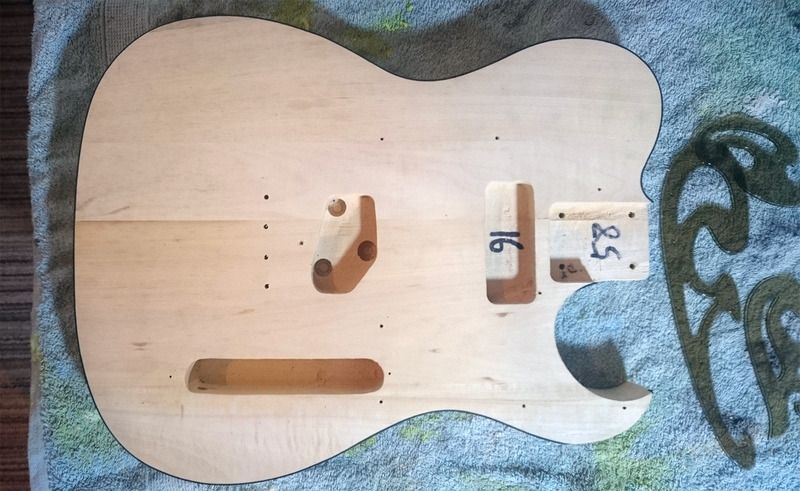
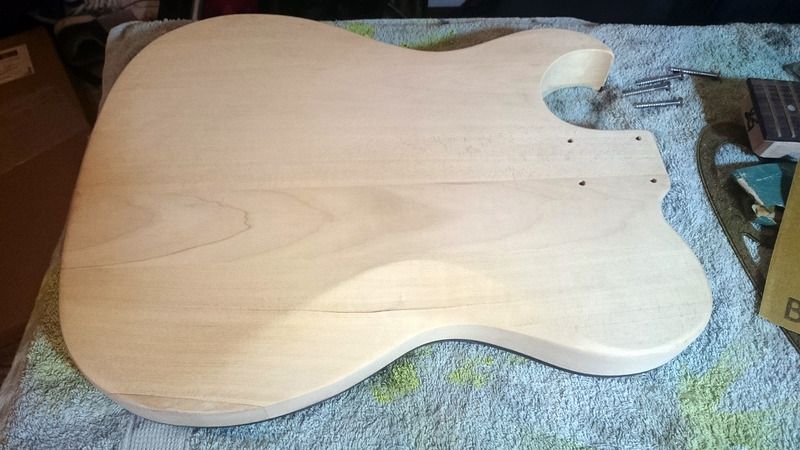
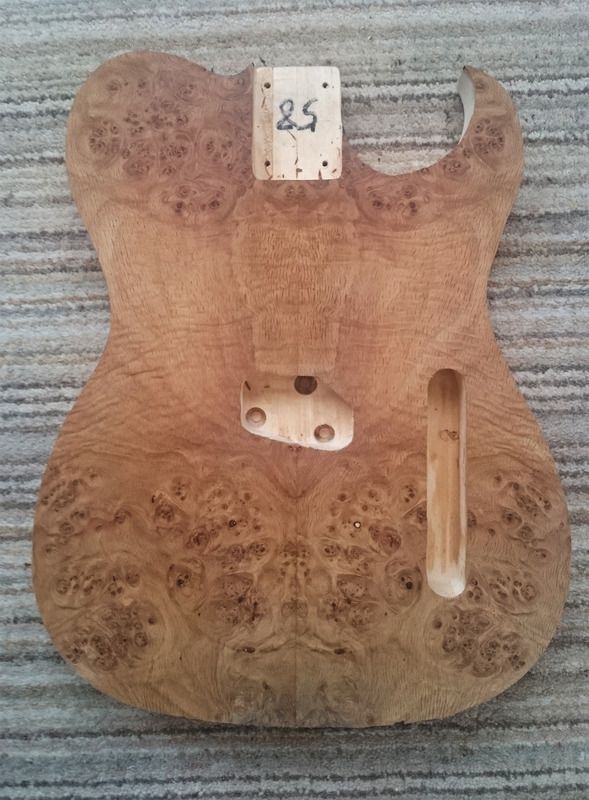
Anyway, here's where we're up to (lots yet to do!) - I don't think I'll be giving Leo's lot any sleepless nights but it's fun all the same:
I just followed a few youtube tutorials and if you're heads screwed on then you shouldn't have a problem. I'm a complete amateur and I haven't fluffed it up yet.. YET!
The router bit was ordered this morning but because of the veneer (0.6mm) and the existing 6mm binding I'm having to go for a 10mm x 2mm binding, I should have skimmed a little off the top before gluing the veneer but its a lesson learnt.
Did you glue the two pieces of your guitar body yourself? Hmm a jointing plane.. another tool to add to the ever growing list.
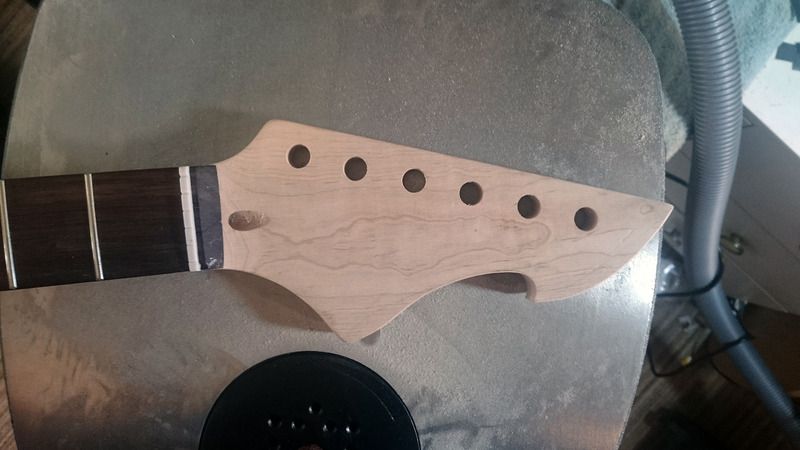
It might be a few weeks until I post any progress due to waiting for things to arrive through the post, but I have glued some leftover veneer on the headstock and I'll see how that's turned out tomorrow morning.
I've tried a few techniques for trimming the veneer but I still prefer to soak it a little and slowly trim with a sharp razor blade, slow work but it stops the burr from splitting plus spraying it with a little water will reveal any bubbles or parts that weren't clamped properly (I had to re-clamp the body because of a few bubbles, I think it was due to a lack of clamps but its sorted now.
It doesn't look like it but the truss hole is cut out, it must just be the light when I took the pic.
I was gonna stain this with a teal dye but I think I might just oil it to bring the grain out.