Gibson Les Paul Signature T refinish

What's Hot
DeadmanDeadman Frets: 3952
edited January 2017 in Making & Modding
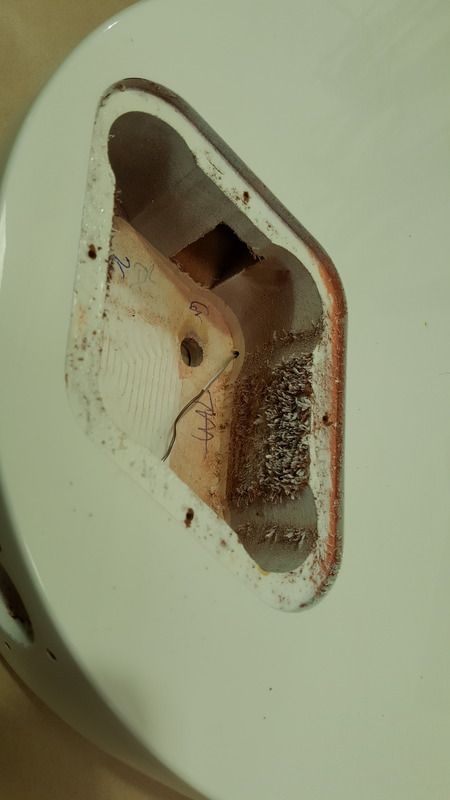
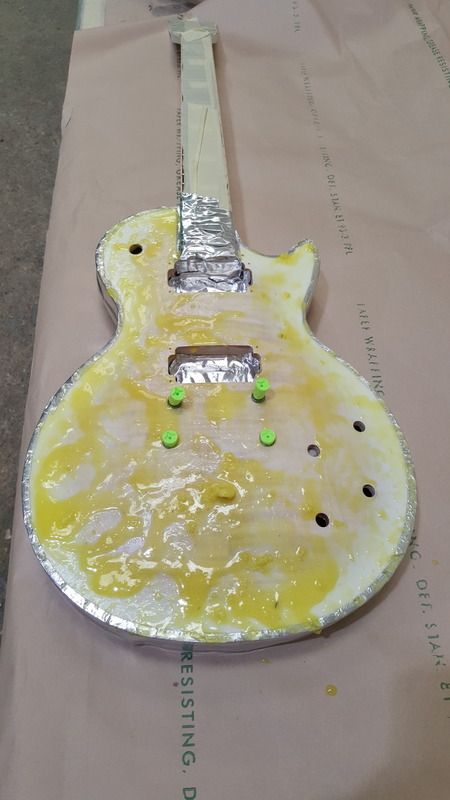
Finally getting round to refinishing the (interesting) alpine white burst Signature T I got for Christmas. The main thing up to now has been to protect the binding, which I've done with aluminium tape with a 1/4" overlap. I'll remove the rest carefully up to the seams with thinners and scotchbrite pads. Paint stripper is on the top as we speak. I'll probably post again once it's all stripped and the refinishing has started. Haven't 100% decided with what I'm gonna go with yet (and how rough is that control cavity!):
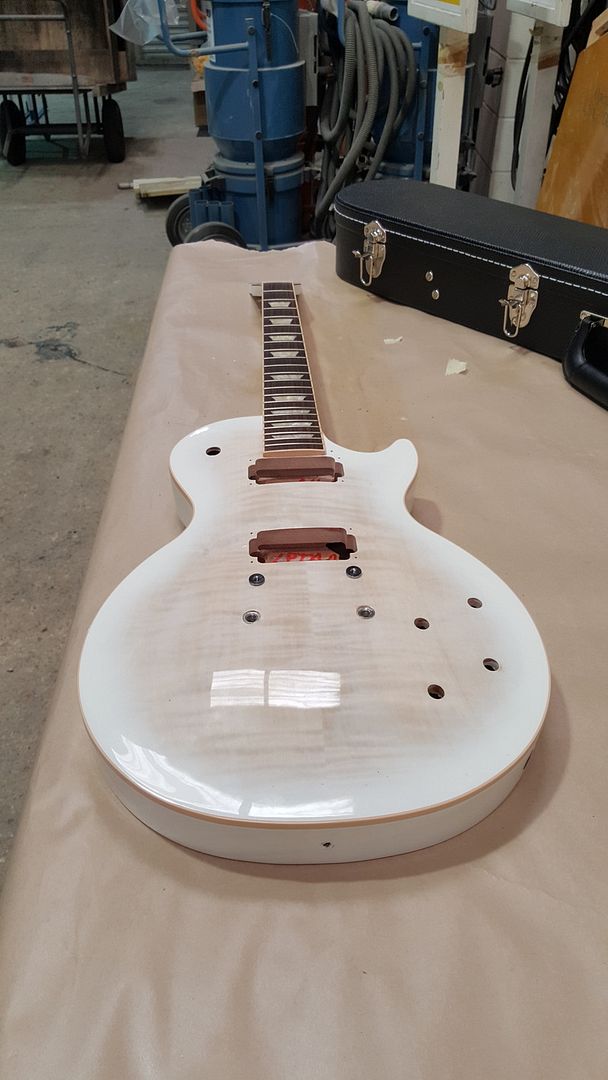
image
image
image

 
0reaction image LOL 2reaction image Wow! 0reaction image Wisdom
«1345

Comments

  • DeadmanDeadman Frets: 3952
    edited June 2016
    I've enjoyed doing this so far, nice way to spend a Saturday afternoon... Just the headstock left to strip and some detail work. After the main stripping was out of the way I removed the ali tape and literally used a pencil brush to apply stripper right up to the binding but without touching it, using a paxolin scraper to take off the remaining finish so as not to damage the wood.The rest just wiped clean with thinners and the binding is clean and undamaged, so that's a relief. The mahogany in particular looks lovely, it was very therapeutic taking off all that white gloop:
    image
    image
    image
    image
    0reaction image LOL 5reaction image Wow! 0reaction image Wisdom
  • WezVWezV Frets: 16825
    Go on.... Give us a "wet" pic of the top.


    I'm really curious to see what the maple is like without white pigment destroying the figure
    0reaction image LOL 0reaction image Wow! 0reaction image Wisdom
  • John_PJohn_P Frets: 2751
    Nice work so far and a looks a lot easier than when I sanded my standard.
    0reaction image LOL 0reaction image Wow! 0reaction image Wisdom
  • DeadmanDeadman Frets: 3952
    edited June 2016
    Ha, it's at work for now Wez. Patience :D
    0reaction image LOL 0reaction image Wow! 0reaction image Wisdom
  • DeadmanDeadman Frets: 3952
    John_P said:
    Nice work so far and a looks a lot easier than when I sanded my standard.

    You removed the nitro by sanding it John?
    0reaction image LOL 0reaction image Wow! 0reaction image Wisdom
  • SteveRobinsonSteveRobinson Frets: 7091
    tFB Trader
    You should pull the bridge studs as they are over the finish.
    0reaction image LOL 0reaction image Wow! 0reaction image Wisdom
  • DeadmanDeadman Frets: 3952
    You should pull the bridge studs as they are over the finish.

    I plan on doing Steve. Just need to make myself a handy tool, with some plastic pipe, a bolt and a washer. Unless you know any other methods?
    0reaction image LOL 0reaction image Wow! 0reaction image Wisdom
  • SteveRobinsonSteveRobinson Frets: 7091
    tFB Trader
    They are usually not very tight. You can just put a machine screw in there and pull them out using pliers.
    0reaction image LOL 0reaction image Wow! 0reaction image Wisdom
  • streethawkstreethawk Frets: 1631
    I can lend you a Faber removal bolt if you get stuck.

    But as steve says, they aren't very substantial inserts.
    0reaction image LOL 1reaction image Wow! 0reaction image Wisdom
  • Andyjr1515Andyjr1515 Frets: 3128
    As @SteveRobinson says, you can probably pull out using a machine screw and pliers.  

    A little trick that is useful for stiffer bushes (as long as they are hollow bottomed) is drop in something hard into the hole that is a bit shorter than the thread top when it's bottomed in the hole - I used an old strat adjusting grubscrew for this one:

    image

    Here you can see the grubscrew in the hole.  Make sure whatever you pop in there is short enough for there still to be screw threads in the bush that can be used and also doesn't have a sharp end that would simply dig into the wood at the bottom of the hole:
    image

    Then screw in the adjuster.  The screw can't go in because the grubscrew is in the way, so the bush has to come out:
    image

    This was a Gibson LP Studio and it took only light hand tightening of the adjuster screw to pull the bush out this far.
    0reaction image LOL 0reaction image Wow! 5reaction image Wisdom
  • DeadmanDeadman Frets: 3952
    Thanks for the offers/comments/suggestions gents. It's much appreciated. I'll try your trick first, Andy. Once the England game is over!
    1reaction image LOL 0reaction image Wow! 0reaction image Wisdom
  • DeadmanDeadman Frets: 3952
    That worked brilliantly Andy, they're out ;)
    1reaction image LOL 0reaction image Wow! 0reaction image Wisdom
  • Andyjr1515Andyjr1515 Frets: 3128
    Deadman said:
    That worked brilliantly Andy, they're out ;)
    Great  :)
    0reaction image LOL 0reaction image Wow! 0reaction image Wisdom
  • DeadmanDeadman Frets: 3952
    edited July 2016
    Paint stripping is complete and the thing's as clean as a whistle. I took my time around the binding and headstock again to avoid any damage whatsoever. Just two small dinks to steam out of the top next (not sure where they came from!), then to raise the grain with some light oak stain as I've decided to stay traditional and go with some sort of light burst. Wet one for you too @WezV ;)
    image
    image
    0reaction image LOL 2reaction image Wow! 0reaction image Wisdom
  • BigMonkaBigMonka Frets: 1784
    That's a top job, it's looking fantastic!
    Always be yourself! Unless you can be Batman, in which case always be Batman.
    My boss told me "dress for the job you want, not the job you have"... now I'm sat in a disciplinary meeting dressed as Batman.
    0reaction image LOL 0reaction image Wow! 0reaction image Wisdom
  • WezVWezV Frets: 16825
    So a bloody nice top with a couple of small flaws. One would be covered by a guard anyway

    I would go very traditional on that and maybe relic to divert attention away from the imperfections
    0reaction image LOL 0reaction image Wow! 2reaction image Wisdom
  • breakstuffbreakstuff Frets: 10353
    Looking really nice @Deadman.Seeing this and @Andyjr1515's thread is seriously making me consider stripping my Goldtop LPJ.
    Laugh, love, live, learn. 
    0reaction image LOL 0reaction image Wow! 0reaction image Wisdom
  • DeadmanDeadman Frets: 3952
    Cheers gents. I might go light relic eventually Wez, but must try to get it spot on first. Then I'll have fun wrecking it :D
    0reaction image LOL 0reaction image Wow! 0reaction image Wisdom
  • simonbeckwithsimonbeckwith Frets: 215
    edited July 2016
    Excellent job! What a great top too, cant wait to see the finished result :)
    0reaction image LOL 0reaction image Wow! 0reaction image Wisdom
  • Andyjr1515Andyjr1515 Frets: 3128
    That looks a great top :) Light oak is a good base stain. My problem with my effort is the rest of it :))
    0reaction image LOL 0reaction image Wow! 0reaction image Wisdom
Sign In or Register to comment.