

Howdy, Stranger!
It looks like you're new here. If you want to get involved, click one of these buttons!
Categories
- 241.7K All Categories
- 22 >> Start Here <<
- 12 New Members
- 8 FAQs
- 86.7K Gear
- 39.5K Guitar
- 3.4K Acoustics
- 1.3K Bass
- 14.6K Amps
- 17.2K FX
- 270 Digital & Modelling
- 765 Other Instruments
- 8.3K Making & Modding
- 421 Gear Reviews
- 107 Guitar Reviews
- 73 Amp Reviews
- 119 FX Reviews
- 87 Other Reviews
- 749 Made in the UK
- 975 Theory
- 1.8K Technique
- 2.1K Live
- 3.2K Studio & Recording
- 2.1K Making Music
- 219 Events
- 15 Guitar Show 2018
- 830 Plug My Stuff
- 105.2K Classifieds
- 41.1K Guitars £
- 2.8K Acoustics £
- 138 LH Guitars £
- 899 Basses £
- 10.5K Parts £
- 18.3K Amps £
- 34.1K FX £
- 2.8K Studio & Rec £
- 6.1K Misc £
- 465 Personnel
- 54.7K Chat
- 36.5K Off Topic
- 1.1K Tributes
- 6.6K Music
In this Discussion
Become a Subscriber!
Subscribe to our Patreon, and get image uploads with no ads on the site!
RabsWood Ash/Black Walnut Nech through... Complete build
 Rabs
Frets: 2609
Rabs
Frets: 2609
As some of you may have read in my posts, ive been working on a custom build for a customer which I didn't want to post until it was delivered and he was happy.. Well that happened today so I am now happy to post the build details.
Its my own shape called a Hammer which is kind of a cross between an SG and a LP and its a black walnut neckthrough with ash wings.
Now since its finished I could just post it all right now.. Or I can post each days work on a separate post on a daily basis...
So how do you want it?
This is the VERY rough mock up which I made at the start of the project (my photoshopping skills are average). I always do these mock ups so that everyone knows whats going on.. The customer told me from the start that hes not too good at using his imagination to fill in the blanks do so I wanted him to feel as safe as possible.
https://i.imgur.com/eKKRAzC.jpg
Ohh and for anyone who doesn't want to go through all those pics, I have made a video of the build so its in a more compressed format ![]()
 LOL 0
LOL 0 Wow! 0
 Wisdom
 Base theme by DesignModo & ported to Powered by Vanilla by Chris Ireland, modified by the "theFB" team.
Comments
Lol... Ok I will do it in sections.. It will be way too long for one post anyway..
So heres the wood.. As mentioned. Black Walnut and Ash
https://i.imgur.com/rIy0GrU.jpg
Ebony board
https://i.imgur.com/Hxx0a3y.jpg
First thing I do while its all still square is to do the truss rod channel.. Which I do by using a straight edge behind the router..
https://i.imgur.com/lTNn0oJ.jpg
https://i.imgur.com/v5XSPz3.jpg
Then I cut the neck piece to rough shape
https://i.imgur.com/6FCFYiO.jpg
https://i.imgur.com/5Il8HjB.jpg
https://i.imgur.com/WJyZD3y.jpg
Testing for body angle and bridge height
https://i.imgur.com/7kz95qT.jpg
https://i.imgur.com/ecT6KjX.jpg
Truss rod access hole
https://i.imgur.com/BJ2Z1wl.jpg
Ash wings glued
https://i.imgur.com/ifkyn47.jpg
And cut to shape
https://i.imgur.com/k6TxnHy.jpg
https://i.imgur.com/9kwTURD.jpg?1
https://i.imgur.com/KaQm04J.jpg
https://i.imgur.com/NMEHBCP.jpg
The customer didn't want binding rather instead a roundover with a small ledge bit (or what ever you call it") )
)
https://i.imgur.com/hrNxUlX.jpg
https://i.imgur.com/EMi39hj.jpg
https://i.imgur.com/uHsuE7X.jpg
And a normal roundover on the back
https://i.imgur.com/BKKbVE5.jpg
Fretboard on
https://i.imgur.com/Rsxsiy0.jpg
https://i.imgur.com/TSCzViL.jpg?1
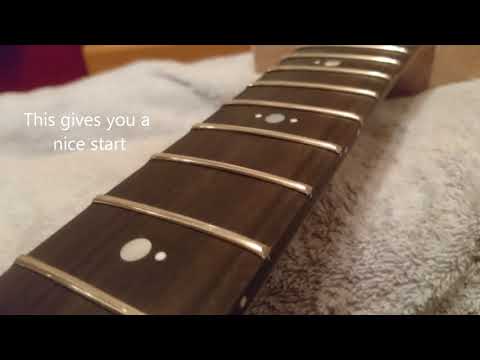
And lastly for this post the fret markers
https://i.imgur.com/GM8XHXD.jpg
https://i.imgur.com/vv7f7f6.jpg
More soon")
http://www.rabswoodguitars.co.uk/
https://www.facebook.com/RabsWoodGuitars/
My Youtube page
Ok heres part 2
Routing pickup holes with my template and router
https://i.imgur.com/JhUgqxB.jpg
https://i.imgur.com/MRQYUCF.jpg
Radiusing neck with block.. Just stick some sandpaper to the bottom.. I start off at like 80 grit until I have it pretty much to shape, then I go through the grades 120, 240, 320, 400, 600 then 1200..
https://i.imgur.com/Nds6aGn.jpg
https://i.imgur.com/WtKI29Q.jpg
https://i.imgur.com/4v8W1ht.jpg
https://i.imgur.com/lnxzPZH.jpg
https://i.imgur.com/LDyKktV.jpg
Always collect the dust to be used later
https://i.imgur.com/tNQ6cIV.jpg
https://i.imgur.com/JwECxkQ.jpg
https://i.imgur.com/1Ax5CHE.jpg
9.5" radius
https://i.imgur.com/Ty2yTql.jpg
https://i.imgur.com/MJfZ837.jpg?1
Fretting time.. So I usually file the tops of the frets slots with a triangular file.. This is done so that if it were ever to need a re-fret, they should come out without chipping so much
https://i.imgur.com/iKJ5EwE.jpg
https://i.imgur.com/ciZIrZF.jpg
https://i.imgur.com/SgFXVtv.jpg
https://i.imgur.com/pK6OuHZ.jpg
Then its time for some neck shaping
https://i.imgur.com/4MekzVW.jpg
https://i.imgur.com/TXWGjMF.jpg
Nice upper fret access like an Sg
https://i.imgur.com/lTctLDx.jpg
https://i.imgur.com/UwHdRGu.jpg
Then I fill the fret slots (went a bit saw happy with them)
https://i.imgur.com/LZQlbWm.jpg
Fill with some of that Ebony dust
https://i.imgur.com/OccsFE8.jpg
Add super glue
https://i.imgur.com/JiO6qZ5.jpg?1
Hey presto")
https://i.imgur.com/2HOBHU2.jpg
So we are looking good.. More tomorrow")
https://i.imgur.com/DIBvere.jpg
http://www.rabswoodguitars.co.uk/
https://www.facebook.com/RabsWoodGuitars/
My Youtube page
Not my style of guitar but top skills.
http://www.thefretboard.co.uk/discussion/61134/sarge/p1
Cheers guys .. I know my guitars arnt to everyones taste but the same could be said for almost any guitar... Id say 90% of the guitars I have built so far have a natural finish.
I will post the rest of the build a bit later this evening.
http://www.rabswoodguitars.co.uk/
https://www.facebook.com/RabsWoodGuitars/
My Youtube page
Ok... So here is part 3
Neck profile done
https://i.imgur.com/usdUXat.jpg
https://i.imgur.com/Dw45fVK.jpg
Then I tidy the frets up with one of these files you can use two ways.
https://i.imgur.com/vUzo2uZ.jpg
90 degrees to get them flush to the board
https://i.imgur.com/NJXbzdi.jpg
And then I think its about 45 degrees for the top of edges
https://i.imgur.com/o4noU6X.jpg
https://i.imgur.com/karUj2i.jpg
https://i.imgur.com/P7FwPuo.jpg
Then the wiring holes
https://i.imgur.com/YyW4T0k.jpg
https://i.imgur.com/UygUx0Q.jpg
Back plate done
https://i.imgur.com/xbnfCLp.jpg?1
https://i.imgur.com/B3YEzEr.jpg
https://i.imgur.com/hGdu5iO.jpg
Then the final sanding before oiling starts")
https://i.imgur.com/jRsM77J.jpg
All ready for finishing
https://i.imgur.com/KJVcIhI.jpg
Finishing on the next post
http://www.rabswoodguitars.co.uk/
https://www.facebook.com/RabsWoodGuitars/
My Youtube page
The first thing I do in this case because Ash has such deep grain is rub Ebony dust into the grain to help highlight it
https://i.imgur.com/2CAhdcj.jpg
https://i.imgur.com/7ToS3FE.jpg
https://i.imgur.com/rvlTGJy.jpg
And on goes the first layer (always an exciting moment in a build)
https://i.imgur.com/Qop2enO.jpg
https://i.imgur.com/GLKUBXn.jpg
https://i.imgur.com/d069Gfr.jpg
https://i.imgur.com/upE1smC.jpg
On with the decal
https://i.imgur.com/I5CwfdN.jpg
I use this Mirco Set solution which helps soften the decal very slightly and allow it too set better
https://i.imgur.com/oGRwrUS.jpg
Once the decal is in place I roll the air and excess liquid out VERY carefully with a cotton bud
https://i.imgur.com/VULq012.jpg
https://i.imgur.com/eaNxjZd.jpg
Getting shiny
https://i.imgur.com/pJ6whW1.jpg
https://i.imgur.com/Y7ooqeI.jpg
https://i.imgur.com/gKfkWUl.jpg
Wiring done
https://i.imgur.com/Jqhd8Xh.jpg
I always do this just before final assembly.. The final fret work.. After im done shaping I sand to 1200 grit then use the dremel tool with some jewellers rouge.
https://i.imgur.com/wZyxukq.jpg
https://i.imgur.com/YFGSSeD.jpg
https://i.imgur.com/UnZgY28.jpg
Now I didn't get much time sadly to take any great pictures of the final product but heres what I have
https://i.imgur.com/dB2PSDp.jpg
https://i.imgur.com/T4XSIS0.jpg
https://i.imgur.com/MRfR91C.jpg
https://i.imgur.com/Kv1DfHR.jpg
And probably the most important pic of all... The first strum by its new owner
https://i.imgur.com/BdXgBMV.jpg
Also I got this VERY brief footage.. People don't always like being filmed and indeed you will see as soon as he notices he stops for a second so I stopped filming as I don't want anyone to be uncomfortable
http://www.rabswoodguitars.co.uk/
https://www.facebook.com/RabsWoodGuitars/
My Youtube page
http://www.thefretboard.co.uk/discussion/61134/sarge/p1
Cheers man... I appreciate the comment
http://www.rabswoodguitars.co.uk/
https://www.facebook.com/RabsWoodGuitars/
My Youtube page
lovely build glad to have a little video I think there should be a rule about build threads you have to have a video with audio at the end. It’s not that you have to be a great player even if you just hit a few open chords and go through the pickup selection of tones tells so much more. Especially if the project uses different construction or unusual pickups etc you get a real flavour of what a guitar is than from pictures.
nice work and the customer was smiling
Amazing what can be achieved in a small work area with a few tools. Love the walnut/ash combination - nice work
@Rabs - that's a cracking job you've done there. I really like the design very much and love the wood combinations. Also, noted the use of ebony dust in the ash grain - adds the emphasis but without the artificiality of the 'stain then sand' approach.
Top class stuff - all of it
Nil Satis Nisi Optimum
No secrets here.. Im a Tru Oil boy all the way
And thanks one and all for the comments... This build was certainly something a bit different.. The idea originally was that we were going to use some kind of Mahogany for the neckthrough.. But I knew he was looking for more of a contrast than that so I went out and found the black walnut.. Such a nice wood.. I went and bought two huge slabs of it for my next builds which will now all probably have a solid black walnut body")
https://i.imgur.com/dHwdxVI.jpg
http://www.rabswoodguitars.co.uk/
https://www.facebook.com/RabsWoodGuitars/
My Youtube page