

Howdy, Stranger!
It looks like you're new here. If you want to get involved, click one of these buttons!
Categories
- 242.5K All Categories
- 22 >> Start Here <<
- 12 New Members
- 8 FAQs
- 86.9K Gear
- 39.6K Guitar
- 3.4K Acoustics
- 1.3K Bass
- 14.7K Amps
- 17.3K FX
- 279 Digital & Modelling
- 766 Other Instruments
- 8.3K Making & Modding
- 422 Gear Reviews
- 107 Guitar Reviews
- 73 Amp Reviews
- 119 FX Reviews
- 87 Other Reviews
- 750 Made in the UK
- 975 Theory
- 1.9K Technique
- 2.1K Live
- 3.2K Studio & Recording
- 2.1K Making Music
- 220 Events
- 15 Guitar Show 2018
- 835 Plug My Stuff
- 105.6K Classifieds
- 41.2K Guitars £
- 2.8K Acoustics £
- 140 LH Guitars £
- 903 Basses £
- 10.6K Parts £
- 18.4K Amps £
- 34.2K FX £
- 2.8K Studio & Rec £
- 6.1K Misc £
- 465 Personnel
- 54.9K Chat
- 36.7K Off Topic
- 1.1K Tributes
- 6.6K Music
In this Discussion
Become a Subscriber!
Subscribe to our Patreon, and get image uploads with no ads on the site!
Not musical; a watch box make
 Sporky
Frets: 28739
Sporky
Frets: 28739
I figure at least some of you enjoy any old make, so here goes.
I have few watches now. I like them; they're pretty and the engineering tickles my brain. But they are not neatly arranged, and it's about time I make something useful, so I am making a box to keep watches in. Three of mine are solar, so it will have a transparent lid.
First step - planning. Some measuring suggested 55mm wide sections, and I have six. Into Rhino3D and I came up with this - I'll work out details as I go, but the dimensions are now set. I'll build it as a sealed box, then cut the lid off and remount it.
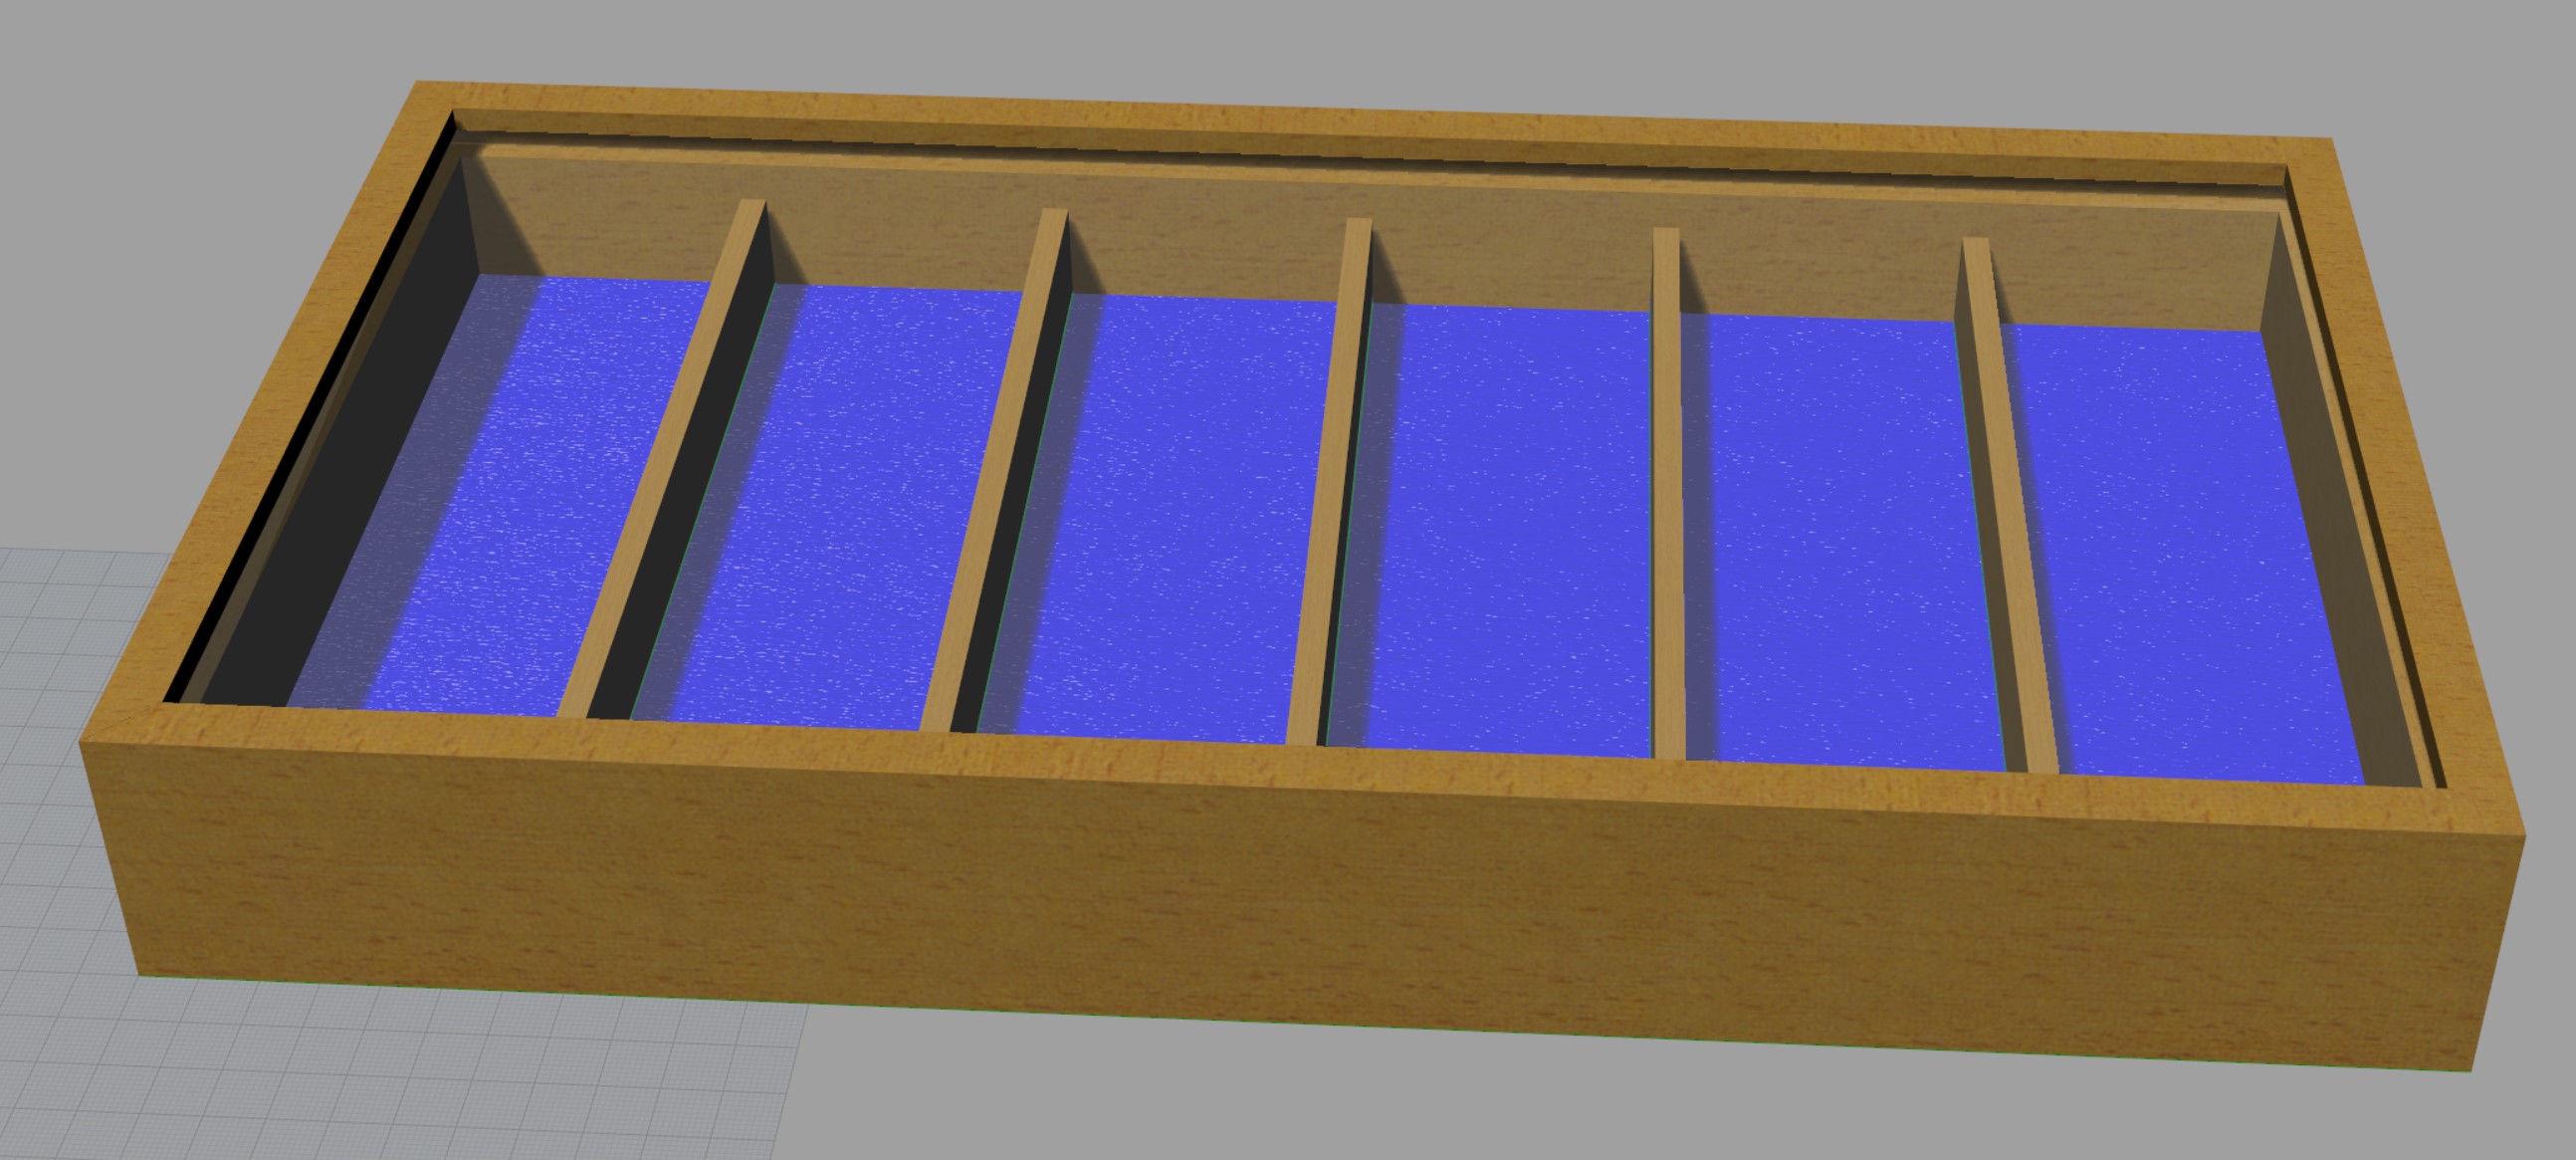
To the workshop!
I have few watches now. I like them; they're pretty and the engineering tickles my brain. But they are not neatly arranged, and it's about time I make something useful, so I am making a box to keep watches in. Three of mine are solar, so it will have a transparent lid.
First step - planning. Some measuring suggested 55mm wide sections, and I have six. Into Rhino3D and I came up with this - I'll work out details as I go, but the dimensions are now set. I'll build it as a sealed box, then cut the lid off and remount it.
To the workshop!
"[Sporky] brings a certain vibe and dignity to the forum."
0 LOL 1
LOL 1 Wow! 1
 Wisdom
LOL 1 Wow! 1 Wisdom Base theme by DesignModo & ported to Powered by Vanilla by Chris Ireland, modified by the "theFB" team.
Comments
Trim them to 55mm tall all the way along (bandsaw, then planer, then thicknesses).
Next each of those is sliced (and planed etc) into a 9mm section for the sides, and a 5mm section for dividers. I forgot to take a photo of that, but here are the end sides.
The to the router table to cut the housings for the 5mm acrylic top and 3mm hardboard base (same slot because it'll have velvet too).
Ta-da.
Slightly fuzzy on the slots, that'll clean up with a scraper later. Next I have to figure out the dividers. Here they are (plus a spare) cut to size using the chopsaw and tablesaw.
Decided to do mortice and tenon (ish) ends. Test cut into some scrap so I can check fit, then the tenk s done with the router table.
And a test fitting - nicely snug. Cleaning up still needed mind.
The hardboard and velvet base will slide in under the dividers. I did also get some tiny cheap hinges:
And did some test cuts in some scrap. Fiddly but doable.
You may just be able to see a little dowel too - mitred corners aren't strong, so I'll be pinning the corners after gluing - I prefer that to using keys as its easier, stronger, and less "obvious".
The resulting mortices (for want of a more accurate term) - all the exact same depth and length, at exactly 60mm spacing.
The London Plane is very, very pretty. Some tear-out though, the grain is a bit odd.
Cut the base to size and glue the velvet on
Cut the lid acrylic to size
Sand everything
Fill any tearout
Apply finish (polyacrylic) except to the mitres
Size the mitres (as in paint them with a 50-50 glue/water solution)
Glue up
Pin the corners
Cut off the lid
Finish the cut edges
Cut the hinge rebates
Reattach the lid
Possibly pack teeny wedges in the slots under the base
Profit!
Couple of weekends worth, I reckon.
I really ought to get some proper storage for watches. They currently live in a (admittedly very high quality) cardboard box...
I think this lot came from Hampton Court. If i remember correctly Surrey Timbers were asked what they'd charge to take away eight or so mature London Planes, and were there before the phone was hung up. That must have been a massive pay day for them.
https://www.fallenandfelled.co.uk/products/london-plane-timber
All the bits cleaned up and scraped, then polyacrylic finish applied, scraped back, reapplied - it'll need a few more coats but the finish will still be really thin.
Cut a bit of hardboard (from an old set of Ikea drawers, I think) for the base - this is about a millimetre smaller in each dimension than the slot it'll go into, to allow for any movement in the sides - and covered it in a thin layer of Titebond, which is then left to go tacky.
Then the velvet goes on, and another test assembly - I've had to shave the dividers down by about half a millimetre to get the ends to sit right. I'm not sure if the timber moved a bit after thicknessing or if I was a bit too accurate measuring - the dividers need a little bit of "float".
Lots still to do, but it's starting to get there.
I've decided to cheat; I've adjusted the dividers to match the curvature of the sides, then they'll be glued into place. The not-straight-ness won't be noticeable in the finished thing. It's maybe 0.75mm over about 40cm.
I've finished the finishing - a few more coats of polyacrylic, scraped back, then a go over with some things I bought years ago that are like scotchbrite pads in different grades, so it's now got a soft satin sheen and just enough lacquer to protect the wood.
Today I will cut the acrylic for the lid, and start the glue-up. I did get the strap clamps set up yesterday, but I might change to using the threaded box clamps instead as they're a bit easier to get square. Not sure yet.